How to set up Apache Spark with IntelliJ Idea 15
Apache Spark is programmed in Scala, a JVM-based language that dramatically simplifies the parsing and processing of large-scale data across nodes in Hadoop clusters. It is relatively new, and provides no official IDEs.
IntelliJ Idea is one of the best IDEs out there for Java/JVM-based languages. It has robust support for Scala with its Scala plugins, which at the time of this post has been downloaded for almost 4 million times. In this post, I will show how to set up a developmental environment for Apache Spark with IntelliJ Idea 15, and it’s as easy as 1-2-3.
-
First you need to acquire IntelliJ Idea. It has a free-of-charge community version, as well as a paid profession version. Both will work just fine for our purposes. This step requires Internet connection.
-
Now let’s install Scala. Depending on your platform, Scala can be acquired either through a package manager,
bash
 sudo apt-get install scala-library scala
or download and install from the Scala binary. -
The next step would be installing the Scala plugin for IntelliJ IDEA. Open File-Settings-Plugins-Browse Respositories, and search for “Scala”
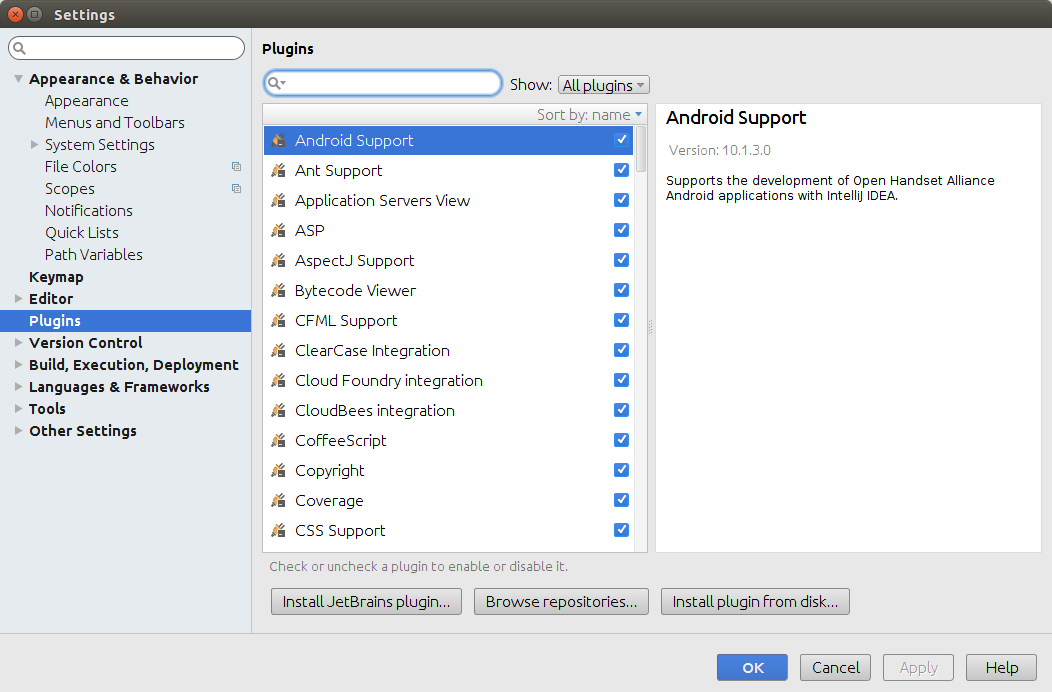
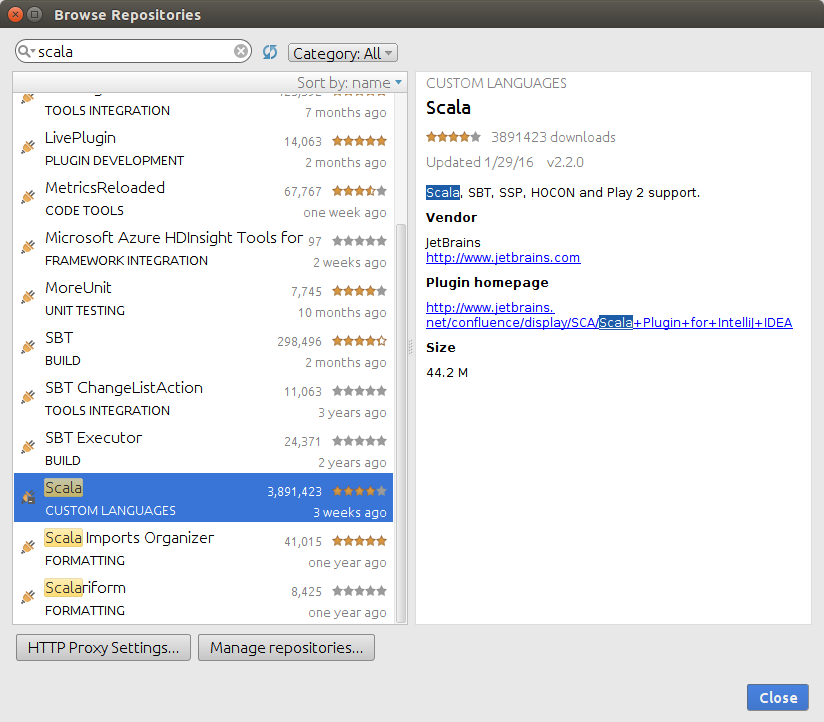 Click the green “Install” button on the right-hand side of the Browse Responsitories window, and the plugin and all its dependencies will be
installed automatically. This step requires Internet connection.
Click the green “Install” button on the right-hand side of the Browse Responsitories window, and the plugin and all its dependencies will be
installed automatically. This step requires Internet connection. -
Install the SBT plugin with the above steps. This step requires Internet connection.
-
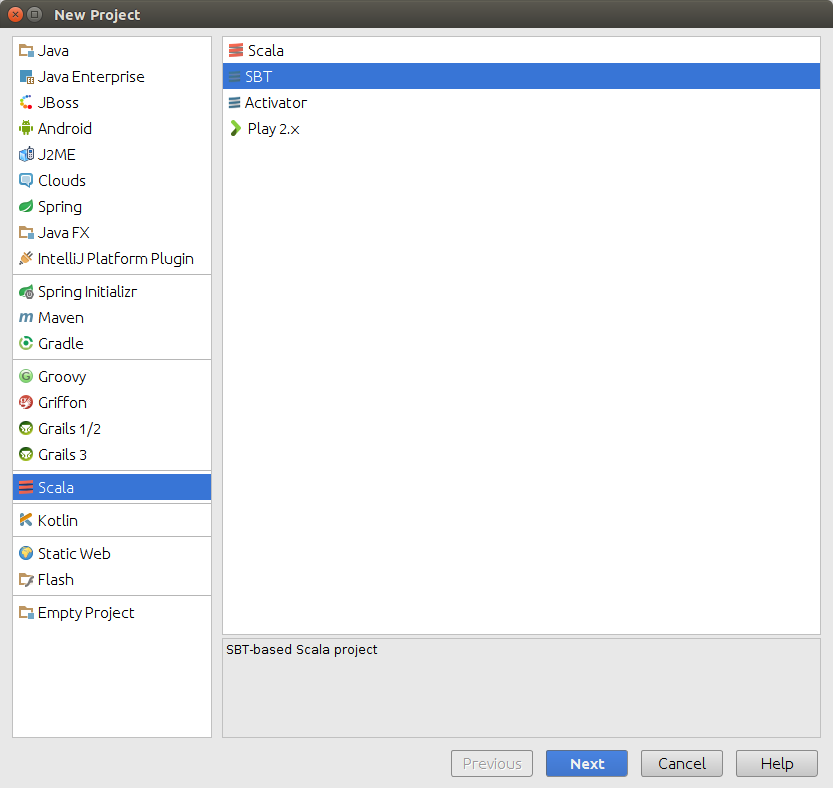
Now let’s start a new project with SBT. Open File-New-Project, choose Scala and SBT project as the following screenshot shows. Follow the wizard to create a new SBT-based Scala project.
-
Now let’s configure this project to use Apache Spark. Copy and paste the following code in your build.sbt file. Wait patiently for SBT to automatically resolve all the dependencies and acquire the necessary packages remotely. This step requires Internet connection and it could take a while.
libraryDependencies += "org.apache.spark" % "spark-core_2.11" % "1.6.0" libraryDependencies += "org.apache.spark" % "spark-sql_2.11" % "1.6.0" libraryDependencies += "org.apache.spark" % "spark-mllib_2.11" % "1.6.0" -
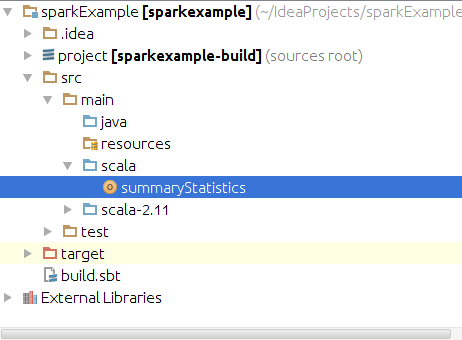
You should be able to use Apache Spark immediately afterwards. Now let’s create an Scala object to run some code! In the Project View on the left hand side, find src/main/scala, and create a new Scala class by right clicking scala, and choose New-Scala Class. Now change the Kind to “Object” and pick a name for your Scala object.
-
Import the appropriate classes for Scala and you are good to go! I attached the code I used to look at the Yelp challenge data at the end of this tutorial. The dataset can be downloaded at Yelp Dataset Challenge.
object summaryStatistics { def main(args: Array[String]) { import org.apache.spark.SparkConf import org.apache.spark.SparkContext import org.apache.spark.sql.SQLContext val conf = new SparkConf().setAppName("summaryStats").setMaster("local[4]") val sc = new SparkContext(conf) val sqlContext = new SQLContext(sc) val yelpRev = sqlContext.read.json("yelp_academic_dataset_review.json") yelpRev.printSchema() yelpRev.describe("stars").show() } } -
Now right click the object you have created in the Project View on the left-hand side, and click Run ‘ObjectName’ to run your code!
No installation is needed and now you have a local Scala IDE that can run and test Apache Spark code. Here’s the result of the above code:
```
root
 |-- business_id: string (nullable = true)
 |-- date: string (nullable = true)
 |-- review_id: string (nullable = true)
 |-- stars: long (nullable = true)
 |-- text: string (nullable = true)
 |-- type: string (nullable = true)
 |-- user_id: string (nullable = true)
 |-- votes: struct (nullable = true)
 |    |-- cool: long (nullable = true)
 |    |-- funny: long (nullable = true)
 |    |-- useful: long (nullable = true)

+-------+------------------+
|summary|             stars|
+-------+------------------+
|  count|           1569264|
|   mean|3.7426557927792903|
| stddev| 1.311467904115546|
|    min|                 1|
|    max|                 5|
+-------+------------------+
```